Kitchen Basics: The Cupboard

So if you were to walk in my kitchen right now and peek in my cabinets, what would you find? Fish sauce, black rice, and fenugreek. My kitchen is just like yours, right? If you’re a new chef, or you don’t cook much, then you might have more dishware than ingredients stashed in your cupboard.

Having the right ingredients on hand makes meal prep easy and often means the difference between take out and a home cooked meal.

Avocados $0.10

My husband and I love watching shows liked Chopped and Cutthroat Kitchen. It’s amazing what the chefs can make that quickly under that much pressure. Their success starts with two things: the right ingredients and the right mindset. In order to make meals fast, fresh, and tasty (the three goals I’m always chasing), you have to start with a good pantry and be savvy about your substitutions. On a side note, if you’re looking for a good substitution guide, check out this one at Common Sense Homesteading.

So how do you strategically stock your pantry?

Only buy the ingredients you like and will actually cook with. Nothing is worse than throwing something out after one use because you never found a way to use the rest of it. Learn what kind of food you like to cook and stock your cabinets appropriately. I cook a lot of French and Asian food so I keep specialty ingredients around for that purpose. Buying small quantities of herbs in the bulk section is a great way to save money when trying a new recipe or unfamiliar cuisine.

Vintage grocery store meat departmentBe space conscious. I live in a tiny apartment so having five or six kinds of pasta and eight kinds of rice on hand isn’t feasible. We’ve all seen the posts about the mythical coupon queen who spends pennies to feed her family by buying in bulk. But let’s face it, 99.999%—okay maybe 87%—of the time that just doesn’t work in the real world for most people. Who has the room to store all that stuff? And besides, I’m lucky to find two $0.50 coupons that I can stack together.

Now, let’s move into my five must-haves in the pantry. I know it’s time to make a grocery run when these ingredients run out.

seasonings

Herbs are the lifeblood of any pantry if you ask me. They spice up bland chicken and can take your dish in a hundred different directions when used properly. I always keep bundles of fresh rosemary, thyme, and basil in my fridge. Always. And during the summer, I grow it on my back porch. In my spice rack I keep onion powder, garlic powder, celery salt, paprika, cumin, oregano, parsley, cinnamon, cloves, and dried ginger. More exotic spices like coriander, fennel seeds, and mace also make frequent appearances.

Tomato paste

Even though I hate tomatoes, I always keep a small can of tomato paste in my pantry. It’s my secret ingredient for stews, soups, sauces, and braised meats. Bonus points if you sauté it briefly in the pan before deglazing like Geoffrey Zakarian does. You can buy it by the tube (kind of pricey) or by the can ($0.69).

starches

This seems like an obvious one, but having a selection of starches is important. I always have jasmine rice, arborio rice (for risotto), potatoes, spaghetti noodles, and penne pasta on hand. These all cook quickly and give you lots of variety.

Lemons

I don’t think I’ve ever walked out of the grocery store without buying a lemon. They last for weeks in the fridge and they brighten the flavor of almost anything. You can toss them in a parchment or foil packet with fish, you can use them in marinades, and you can use them in baking (hello, lemon pound cake).

Onions

Maybe it’s my German heritage, but I always keep onions in my kitchen. They make a great base for roasted meats, are invaluable to stews, and when caramelized, add a ton of flavor to whatever you put them on. I usually stick to yellow onions and Vidalia varieties when they are in season.

So, the next time you go to the store, make sure you add these to your grocery list. As always, happy cooking!


Kitchen Basics: The Recipe Won’t Cook Itself

Today we’re going to talk about one of the most basic kitchen questions I can think of: how to follow a recipe. This may seem like a simple concept, but many people don’t know where to begin.

“I like to cook,” she said and then snorted. “I mean, I follow recipes. Anyone with a brain can do that.”

The guy to my left muttered, “tell that to my burnt pasta.”

That conversation actually did happen in one of my classes a few weeks ago. Judging from the embarrassed cringes of some of the other students, the guy wasn’t alone. Recipes can be deceptively tricky.

cooking-1013455_1280

I remember one time when I was nine when my cousin and I tried to bake a cake at a family gathering. It was around Easter and her mom had a new, bunny shaped pan, so we offered to make dessert. Everything went well and the cake came out of the pan without a problem. We were proud until we tasted the first bite and realized that somehow we had grabbed the garlic powder instead of the baking power. Needless to say, we trashed the cake and opted for ice cream.

Many of the ideas I’m about to talk about are basic. Like really basic. But you shouldn’t roll your eyes. A few weeks back, I managed to botch a recipe I had made numerous times because I forgot to add an ingredient, oops! So without further adieu, here is my advice for conquering your next recipe.

A recipe for success
  1. Aim for accessibility. You should always start with a recipe that you can actually, reasonably, and on a good day do. A souffle is probably not an ideal recipe for someone new to the kitchen. But something like lasagna is almost infinitely forgiving. Many novice cooks pick recipes that are too advanced to easily pull off without a lot of practice. This just leads to frustration and burnt pans.
  2. Mise en place if you please. It doesn’t take a minor in French to know that the concept of mise en place is your friend in the kitchen. This idea simply refers to setting out all of your ingredients and prepping them before you start cooking. While, the mise en place you see on popular cooking shows is a bit extreme (who washes all of those tiny bowls), a little preparation goes a long way.
  3. Think visually. Take a scroll through Pinterest and you will likely see lots of images like the ones below. Info-graphics can be your friend because they help you visualize the recipe.
  4. Know your terms. Nothing is worse than realizing, when you’re elbow deep in flour, that you don’t know what the word knead means. Before you start cooking, you should always look over your recipe and look up any terms or techniques you are unfamiliar with. There are countless videos out there that will teach you the finer points of folding, sauteing, sweating, and caramelizing. I sometimes write reminders in the margins of my recipes so I don’t forget.
  5. Read the reviews. I almost always choose recipes that have been around long enough to have reviews. Even when I pull a recipe from a book or magazine, I’ll look it up online to see what people have to say about it. Lots of published recipes are never fully tested, so there may be errors in the ingredient list or the directions.

Hopefully, these pointers will help as you step into the kitchen. Remember, cooking is supposed to be a fun and tasty adventure, so don’t let it beet you down.

Kitchen Basics: Let’s Get Really Basic

So to end my holiday blogging hiatus (hello February), I thought I would start a series of posts focused on kitchen basics. I am fortunate enough to have a family who loves food and loves to cook, so for me, I grew up in the kitchen. But a lot of my friends and coworkers didn’t.

I was talking to classmate last week about baking when she sheepishly admitted, “I want to bake…and my dorm has a community kitchen…but to be honest, I’m not sure I know the different between a whisk and a spatula.”

This conversation really got me thinking. Even though we live in an age where information like that is available at our fingertips, most of us don’t know where to begin. We need a filter, not a funnel.

Spatula

It’s hard to know what to ask when you don’t know where to turn to. Over the years, I noticed something when reading blog comments (which I always do before trying a new recipe): commenters can be vicious to newbie cooks! Never fail, there is usually an intrepid soul who dares ask a basic question and then gets zested for their trouble.

Huffpost Taste did a wonderful, hear my sarcasm, job shaming novices in their article The Silliest Cooking Questions on the Internet. While some us might be able to answer these questions with ease, not everyone can. Rest assured, this is a no shame zone.

So, to kick off the series next week, I’m going to start by talking about how to read a recipe. It’s kitchen 101 y’all.

You can find the followup post here: The Recipe Won’t Cook Itself

Christmas Traditions

For me, Christmas is probably my favorite holiday. I have the best memories of my mom decorating the house for Christmas with me and us making cookies together. My mom’s mom loved Christmas too. A lot of our decorations came from her including a whole miniature town with houses and mini pine trees. Adding the snow to the village was always my job.

Ornament

This year is extra special though. Hubby and I decorated our first Christmas tree and bought our first ornament together. It was really fun to start new traditions.

Growing up, my family always bought a “yearly” ornament. Decorating the tree was like taking a stroll through the years of Christmas’ spent together.

For me, reindeer was always my thing. Mom got me reindeer decorations, stuffed reindeer, reindeer ornaments … and even one year a reindeer candle, which I’ll never have the heart to light.

Lantern

It was so much fun decorating the apartment together. I swung by Home Depot and snuck a few fresh pine boughs from the tree cutting area. They make great cheap decorations and they make the house smell wonderful!

Fresh pine boughs

I even decided to try my hand at making a wreath from scratch with the leftover pine bits. I used a wire hanger for the base and used green floral wire to wrap the pine to the base. It was really simply and saved us like $15. I noticed later that it did turn out a little lopsided but that’s how people know its homemade.

Pine wreath

Pine wreath

It’s so nice to be finished with school for the semester. Now that I’m off, I got to work on projects like the wreath and this little gem. I found the chalkboard base at Target for $3 and a chalk pen for $1.

DSC_0072

I hope everyone has a very Merry Christmas and stays safe this holiday season. And remember, pig chef wants you to enjoy the holiday goodies.

DSC_0062

Braised Leg of Lamb

When I think about rich, holiday meals, I usually envision prime rib or a crown roast of lamb. Yum. This Christmas, I thought I would try my hand at a braised leg of lamb. I started browsing Pinterest for lamb recipes and I came across this one from Saveur.

Herbs

It sounded promising so last night I gave it a try. Hubby declared that this was better than beef pot roast! If you’ve never had lamb before it’s a lot like beef but with more sweetness and flavor. Personally, I think lamb is way more tender than beef. But that’s just one chef’s opinion.

The recipe starts out with a boneless leg of lamb, adds lots of veggies to roast with the meat, and then finishes with a sinful sauce. I made my in the morning and then heated it up for dinner last night, so it is a flexible recipe.

Braised Lamb

2-3 pound boneless leg of lamb
1 onion cut into wedges
8 sprigs fresh rosemary
3 sprigs fresh marjoram
1 head of garlic, peeled
3 bay leaves
6 carrots, peeled and chopped into chunks
6 small Yukon or red potatoes, scrubbed
1 cup chicken stock
1 cup sweet white wine

LambLamb

1. Preheat oven broiler. Start by opening the leg of lamb up and liberally seasoning the interior and exterior with salt and pepper. You can do this right in the roasting pan like I did. This step is vital because it helps build the flavor base for the rest of the recipe. Place the roast fat side up and score the fat cap with a knife. Broil the meat for 10-15 minutes until the outside is nice and dark

2. Remove the roast from the oven and place the vegetables, herbs, garlic, and liquid in the pan. Be careful if you are using a glass pan. If this is the case, make sure you let the pan cool down before adding the liquid or else the pan could shatter. Yikes! I speak from personal experience.

3. Turn the oven down to 200°F and place the pan back in the oven. Bake, checking occasionally, for an 1.5-2 hours. The lamb should reach an internal temperature of 130°F to 145°F depending on how you like your lamb cooked. I like mine slightly pink so I aim for 140°F. Remove the meat and vegetables from pan, discarding the garlic and herbs. Now let’s make the gravy.

Gravy time
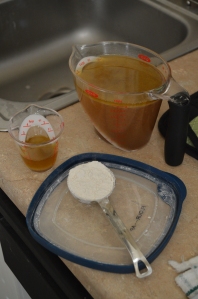
4. To make the gravy, pour the fat and juices into a measuring cup. Let sit for a couple of minutes so that the fat rises to the top. When making gravy the general rule is 1-1-1. One cup of liquid to one tablespoon of fat to one tablespoon of flour. In my case, I had two cups of liquid so I used two tablespoons of fat and flour. Add the fat and the flour to a small pot and whisk over medium heat.

The goal here is to toast the flour and make a roux. Once the flour starts to toast it will bubble and begin to darken. You will need to cook the flour for about DSC_0086
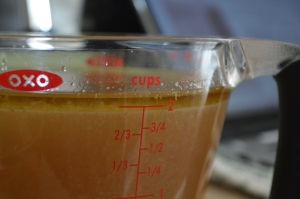
3-4 minutes. Once the flour is cooked, slowly pour the liquid into the pot and whisk like mad. The mixture should begin to thicken right away. If it doesn’t, this means you may have added the liquid too fast.

But don’t fret, simply dissolve a little more flour in a few teaspoons of cold water and add to the gravy to thicken making sure to bring to a boil.

GravyGravyGravyGravy

Now comes the part you’ve been waiting for; it’s time to dig in. My hubby loved this recipe and so did I. Many novice cooks feel intimidated by recipes like this but they shouldn’t. If you can buy a leg of lamb, you can cook it.

Braised lamb

Good luck!

French Silk Pie

French silk pie is a classic. In my corner of the world, most holiday celebrations begin by going to Village Inn to pick up this pie. A few years ago, I decided to try my hand at making one from scratch. The result? Decadence.

So what is the base of French silk pie? Well here comes the part that usually scares people—raw eggs. Yep. That’s what gives this pie its velvety texture and rich taste. I’ll say this up front though, there is no good substitute. Some recipes cook the eggs first or use gelatin, but it just isn’t the same.

But don’t fear, you can find pasteurized eggs in most supermarkets. Places like Sprouts also carry them. Buy using pasteurized eggs, it drastically reduces the chances of any illness. There will always be egg naysayers, but in my culinary opinion, the pie is worth it.

French Silk Pie

1 cup butter, softened to room temperature
1 1/2 cups sugar
8-10 tablespoons cocoa powder
2 teaspoons vanilla
4 large pasteurized eggs
1 chocolate graham cracker crust

1. To start off, dump the sugar in a food processor and pulse for at least 1-2 minutes. This grinds the sugar slightly finer and makes sure that you won’t have a grainy pie. When you think you’ve ground the sugar enough, grind it some more. When I do this it usually generates a small cloud of sugar dust so consider covering your food processor with a towel.

2. Cream your sugar together with your butter until the mixture is fluffy. I use a hand mixer. This should take 2-3 minutes. Add the cocoa powder and vanilla and carefully blend in.

3. Now, add your first egg. Beat at high speed until the egg is thoroughly mixed in and the mixture begins to look aerated. Adding the eggs and beating them in one at a time is where the magic begins to happen.

DSC_0226

Add your next egg and mix. Repeat with the remaining eggs.

DSC_0231

By the time you’ve added all your eggs, the mixture should be noticeably lighter in color and fluffy.

4. Taste test and adjust the amount of cocoa and vanilla to your preference. Once satisfied, scoop mixture into your crust and smooth top. Place the pie in the fridge to chill for 2-4 hours.

French Silk Pie

This pie is a family favorite. I made it over Halloween and had to make a second one a week later because some people didn’t get enough. The first time I made it, I asked my hubby to cut some slices and this is what I came back to.

                                Pac-Man anyone?

Christmas Compliment Advent

It’s ironic that so often the holiday season is so hectic that we rarely take time to spend with our families. Not right now sweetie, I’ve got thirty-seven freaking mini gingerbread houses to make!

This year is different. It is my first Christmas as a married woman. Not to mention that it will be my first real break from school since the summer. Hello messy hair and flannel pajamas. Hubby and I both look forward to starting traditions for our family this year like decorating the tree together. But I wanted to go a bit further and do something special for him.

Mini envelopes

So I thought I’d do twenty-five days of compliments, dates, and acts of love for him. This idea has been around a while (thanks Dating Divas!) so there are plenty of variations for families or even boyfriends and girlfriends.

LabelsLabels

I found a great template on this blog for how to make small envelopes. And I created this print out for the Advent Compliments. I also used this adorable printout from the blog Simple As That to dress up the envelopes. All told, the project cost under $10.

  • One package of black card-stock from Dollar Tree $1.00
  • One package of gold card-stock from Dollar Tree $1.00
  • Two sheets red paper from Hobby Lobby $1.50
  • Two card display clotheslines from Target $6.00

Some of the envelopes have compliments and some of them have dates.

Advent

Happy Thanksgiving!

Thanksgiving was especially important this year; it was my first major holiday as a married woman. It was really different coming back home and realizing that. This Thanksgiving was also the first time my cousin Lauren hosted it. She did a wonderful job!

Thanksgiving Table

Not only did she set a lovely table but she also cooked a delicious turkey. Martha Stewart would have been proud.

TurkeySliced Turkey

In my family, Thanksgiving is a big deal. I’ll always associate my family’s celebration with casseroles, pies, and the great cranberry debate. Choosing the “right” cranberry side is a heated topic of dispute.

DSC_0044

My grandparents love the kind with orange peel, which my dad hates. My hubby and my dad both prefer the cheap, canned cranberry product. And my aunt and uncle like the kind from Lambrusco’z. Me personally? I can’t stand any of them.

DSC_0034

My mom and I jokingly call Thanksgiving the brown meal because of how many casseroles my family makes. Corn casserole. Green bean casserole. Yams. Dressing. If it’s a casserole, chances are my family makes it.

I look forward to some future Thanksgiving when the hubby and I are in a bigger home and we can host the family. Who knows how many kinds of cranberry sauce we’ll have by the time we have them over?

Perspective: n. /pərˈspektiv/

Three years ago I pinned this pin to one of my Pinterest boards. I had no clue that my life would be completely different in three year’s time.

Now, I sit on my living room couch blogging while drinking a cup of coffee I made in my kitchen. There are some days where that really sinks in and I marvel at the blessings in my life. My God, my husband, and my home.

If I could go back three years and tell myself some of the lessons I’ve learned, I would probable tell myself to love more and worry less.

  • Love more and worry less. Some things in life are simply not worth worrying about. As I got older, I really started to appreciate some of the advice I’d gotten when I was younger. Be yourself and love others. Even when it’s really hard.
  • Be weird. There is no one on the planet like you or like me. We are unique, and that makes us special. Embrace what makes you you even if that is kind of weird. For me, I love knitting and often people see this as a weird hobby. That’s okay.
  • Be as tenacious as meek. In our culture it’s really hard to know when to be fierce and when to turn the other cheek. For most of my life, I tried to figure out which path–strength or weakness–was the correct one. I’ve realized though that the answer is usually both.

Quote

Ode to Motherly Advice

It’s my first cold of the season. Sigh. Nothing says welcome to post-midterm stress like sinus pressure and a scratchy throat.

But on the bright side, I’m fortunate enough to have a wonderful hubby who’s done the dishes, made me soup, and pampered me. It almost makes up for being sick. Almost.

Any time I get sick, I usually have tidbits of motherly advice, old wives’ tales, and lore floating through mind. Because everyone knows that chicken noodle soup really does help cure a cold. Even The New York Times agrees.

But what about some of the other words of wisdom like starving a fever, chugging orange juice, and not going outside with wet hair? Well not everything you grew up hearing is true. My mom did have it right, though, when she told me as a kid to take a warm bath.

Herbs

Epsom Salt Cold DETOX
  • 1 cup Epsom salt
  • 3/4 cup baking soda
  • 12 drops essential oils
    • lavender
    • rosemary
    • peppermint
    • chamomile
  • 1 teaspoon ground ginger (optional)

Combine all ingredients in your bath and soak for as long as it feels good. The steam from the hot water will help with congestion and the essential oils ease headaches, congestion, and aches.